MENU

Showing posts with label diy. Show all posts

Thursday, February 10, 2022

Easy DIY Valentine's to Make in a Pinch

I look forward to Valentine's Day every year. Even though I believe it should be every day you show how much you are loved and love each other. But I like to put together little baskets for the boys with items usually from the dollar store or bullseyes playground. I also really enjoy making the kids valentine's to their friends. Last year we weren't allowed to do anything fun, due to Covid so we were stuck just purchasing the premade boxed cards from the store. 


This year, I asked the boys what they wanted to do for their friends? Joey of course said Dinosaurs and Lego's and Vinny said BUBBLES!!


Dinosaurs- went way up in price
Blocks- another option


Bubbles-Out of Stock
Bubbles- another option


If you want more ideas for Valentine's.. Check out this post here

If you are looking for date night ideas that are budget friendly or free.. check out this post here!

Friday, April 10, 2020

Easter Bunny Craft


We came up with a cute activity to incorporate both Vinny and Joey's footprints. It was so easy to put together and we know the grandparents will love to receive these since they aren't able to physically spend Easter with us.

Supplies:

Two Paper Plates (1 dinner size, 1 cake size)
Card Stock 
Paint
Googley Eyes (optional) 
Ribbon
Glue

Directions:

Using paint, make your footprints on the card stock. You can use any color paint you want! While the paint dries, I used hot glue and put the paper plates together. I then glued the googley eyes on with glue stick, but you can draw them on if you don't have any. Make a nose and a mouth with crayon, marker, or colored pencils. Make a bow with ribbon and glue between the two plates. Cut out your footprints and glue onto the plates. Don't forget to write your child's name and age onto the plates, so you can remember when it was made!
 photo signature.png

Thursday, April 9, 2020

Toddler Activities to Keep Little Ones Busy

Where's my moms of little ones at? How hard is it to keep the little ones occupied all day long, especially if you are experiencing rainy or winter weather outside!
The first week I was all on board with the learning, using ABC Mouse and some work books we already had on hand, but after about day three, Joey got bored and it became more difficult. I am trying to stick to his 'school' schedule as much as possible, but throwing in some fun Joey- Mommy time!
These is our routine that we follow.. I am NO expert- but this seems to work for us! Now in the middle of this, I am trying to get things done during the day, and luckily a lot of my work I can do once my husband gets home or after I put the boys to bed. So, do what is best for you. If you have to resort to cartoons, screen time, movies etc. no one should judge you! We are all trying to get through this time together and should be cheering each other on!
This is a template of the schedule we try to follow. I put times on them, but in reality, it's whatever the moods are for the day. Sometimes Joey is really on a roll with the 'school' work 
6:00am- wake up/ lay in bed/ play with cars upstairs
7:00am- head downstairs, breakfast
7:30-9am- free time - cartoons, books, toys
9:00am- Snack 
9:30-11am- ABC Mouse/ Workbooks
11:00am- Free time
12:00pm- Lunch
12:30-2pm- craft/ books
2:00pm-try to nap (ha) walk around block
3:00pm- if daddy is home, ride bike outside until dinner
5 or 6pm- dinner 
7:00pm- bath and bedtime
So what are some activities we've been up to? Well here are just a few!
Games: Pop the Pig, Let's Feed the Very Hungry Caterpillar, The Sneaky Snacky Squirrel, Don't Break the Ice.

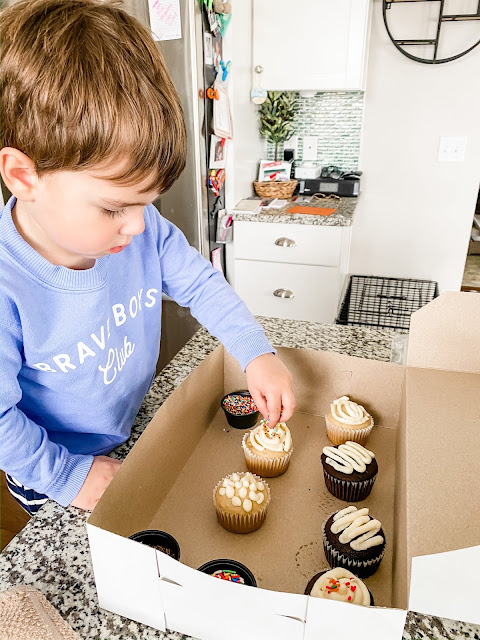
Activities: Cupcake decorating, Baking cake pops, coloring, making cards for family and friends, Easter Bunny Craft. ABC Mouse, Kumon learning books.
We got the box of cupcakes delivered, but you can easily make them yourself your local bakeries don't offer this. You need cupcakes, icing, sprinkles, and anything else you want to decorate with.
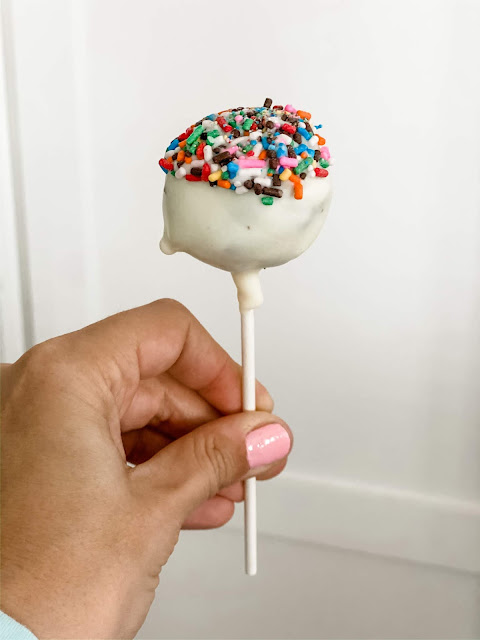
Cake pops were very easy to make!

Ingredients:

Boxed or store bought cake
Melting Chocolate
Store bought frosting
Sprinkles to decoration
Sticks

Directions: 

Make boxed cake according to box. I made them a dozen using half of the cake. Whether you made a boxed cake or bought a store bought one, the next steps are the same. Break the cake up and add in frosting. Using a fork keep mashing the cake with the frosting. I used about half of a container of frosting. But use as much until you feel as though you would be able to roll the cake into balls. Form balls by rolling in your hands and put stick halfway into ball. Place on a baking sheet and put into freezer for about an hour. Melt chocolate and dip cake pop in. Cover the stick a little as well, so that it doesn't fall off. To let them dry, I cut holes in the cake box, however I made them pretty big, so they were top heavy. I had my assistant (Joey) hold some until dried. We added sprinkles but you don't have to. 

 photo signature.png

Tuesday, November 5, 2019

Little Blue Truck | Trunk or Treat 2019

I was so excited last Halloween seeing all the parents decorate their cars for Trunk or Treat and said I'm so gonna go all out next year. Flash forward to this year, I completely forgot about Trunk or Treat until Sunday when I found a paper stuffed in a drawer detailing the specifics. In defense, I have a lot going on right now!! Anyway, I got to planning. First step of course was pulling up Pinterest, but I wasn't feeling the creative spark. So next, I went to Joey's Halloween Book Nook to see what inspiration I could find. It was a toss up between the Great Pumpkin Charlie Brown and Little Blue Truck's Halloween. For the Great Pumpkin, I was thinking about doing the scene from the pumpkin patch and the kids trick or treating. However, I didn't have chicken wire on hand and wasn't about to fiddle with that non sense of making fake ghosts. HA. So I opted for Little Blue Truck's Halloween. 
I knew I wanted to make a cut out of Little Blue so this way the kids could take a picture with it. So, now I needed to find cardboard big enough and how to execute it! 


Halloween in PA was filled with severe storms, so our school actually pushed back our Trunk of Treat to Friday afternoon. It was still sooo windy though, and some of my props wouldn't cooperate. 

I had taken pretty clear pictures of alll the dressed up characters in the book. Thankfully at work, we have a large scale printer that I was able to edit them and print. If you don't have access to this though, you can always send your prints to a Staples or Kinkos! Since they were printed on regular paper, I knew I had to make them stand. Using glue stick I glued card stock to the back of the image, and then cut them out. I realized I could have used my Cameo to prolly cut this out, but I wanted them in large format- and on a budget!


I cut all the characters out and hot glued large skewers we had left over from the Summer that we used for smores. To hold the characters, I got a bale of hay from a local farm. When I imagined it, they were a lot more spaced out- but due to the wind I had to group them pretty close.


I also picked up some sunflower and pumpkin picks from Hobby Lobby to add to the hay bale. I printed out the quotes from the book of what each character said when they revealed their costumes!


Again, due to the high winds, Little Blues 'Ghost' costume wasn't working out. But I had gotten a white table cloth from the Dollar Store, and cut his big googly eyes out with the caption from the book. However, I ended up tying his 'costume' to the latch on the trunk to try and get him to stand!


Either way, the kids loved it! We got so many compliments on it! The biggest one came from my own little Spooky Ghost!!


Little Blue Truck Cut Out:

Supplies Needed:

4' x 4' cardboard
Blue, White and Black Acrylic Paint 
Paint Brushes
Projector
Thin Sharpie
Googly Eyes
Sharpe Knife or Blade 

Directions:

To make life easier, and I don't have the steadiest hand- I used an image I pulled from Google Images and showed it up on the projector to trace it. I then painted the truck using the image. I also, but the color codes on the cardboard while tracing the truck out. 


 photo signature.png

Tuesday, July 2, 2019

DIY Lemonade Stand or 'Big Brother' Stand

As you may know from this post, we are expecting our second child and announced it with this adorable 'Big Brother Lessons' stand. 

It really was so easy to make, the only thing I would change is to use thicker wood to hold the sign up. We used a cardboard box we had, but it was a little too heavy for our wooden dowels.

I wanted to be able to take my stand apart (at least for now) to store it, so I actually used command strips to hold the crates together instead of nails or screws. When Joey gets a little older, and perhaps would want to make a lemonade stand one day, we will definitely be nailing it together!


There are so many different ways to make this, and like I said before, when Joey gets older and will actually use the stand we will definitely modify it, but for a temporary solution for now, this is what we came up with!

Materials Used: 

4 crates- you can also stain or paint them.
Command Strips - or nails 
2 wooden dowels (we used 1/4in) use thicker is sign is heavy
Card Board for sign- or wood (make sure to secure with screws and heavy dowels)
Duct tape for sign
Chalk paint for sign
Chalk for sign
Accessories for stand

Directions:

Start by figuring out the design by lining up your crates however you want. You can design them however you want- one turned in, one turned out,  'shelf' with both top crates turned out - whatever you want! We used heavy duty command strips to make it temporary. Place one strip on each corner of the bottom crate and remove the backing of the top strip. Line back up and press down hard on the top crate so that the top crate sticks to the tape of the command strip. Do the same with the other side. To hold the crates together temporarily, I did the same thing with the command strips. I used four strips- one on each corner of the crate to hold to the other. 
* If you are using nails, do that same but replace the command strips with nails or screws (four- one in each corner of the crate) and then nail the crates together. 

For the dowels, I used command strip small hooks inside the crates to hold in place. We took our pictures outside on a windy day, so we needed some duct tape to hold the dowels from blowing away! For securing the sign we duct taped the back of the sign to the dowels. (you can see in the picture one was leaning- that was due to the wind that kept blowing it!)

For painting the sign, I used Martha Stewart chalk paint (two coats) on an extra piece of cardboard I had from a shipping box. I stenciled on the words using a chalk marker and then colored in with regular chalk!

Since our stand was a 'big brother' stand, we used baby toys and kept it simple. Be sure to check out the dollar section of Target if you plan on doing a lemonade stand- they have such cute accessories and garland you can use!

That's it.. so super easy! I'd love to see if you make your own either temporary or permanent stand!


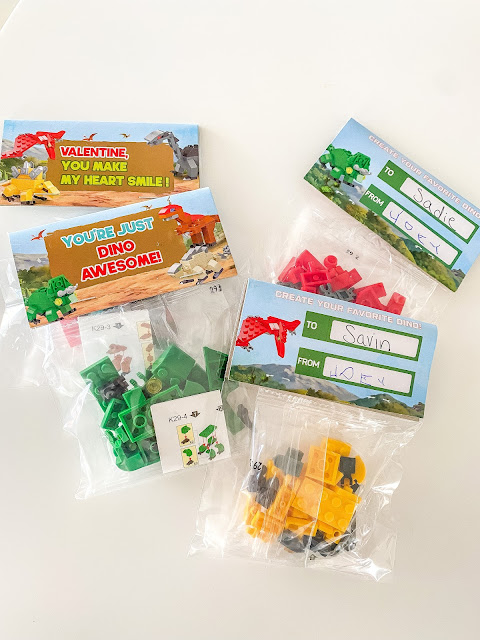
 photo signature.png

Monday, December 17, 2018

Gifts for Teachers | Free Downloadable Tag

This is the first Christmas Joey has had teachers so I started to think about gifts pretty early on. Reading other blogs about ideas and how much to spend since this was new to me! I decided on doing small gifts for all the support teachers and getting something a little bigger for his two main teachers. 
Here are some ideas I came up with!!
Teachers are constantly drinking water throughout the day, and what's another boring water bottle or mug, when you can give them an adorable Lilly Pulitzer Swell bottle tied with a cute tag and ribbon!
Download this FREE tag HERE
 
There's no denying these teachers wash their hands a lot- I mean you try dealing with 8-10 toddlers at a time! So I thought it would be good to get them each a yummy scented foaming hand soap from bath and body works with a cute tag and throw in a gift card to either Target or Starbucks. For his two main teachers I got them the same thing, but added in these blanket scarfs. For the ladies in the office, I added the soap as well as a candle for them to enjoy.
If you haven't thought about teachers gifts yet, you are in luck, because it's the perfect time to purchase hands soaps and lotions from Bath and Body Works and I have a free download for a fun tag to add to it! Throw in a hand lotion, gift card, candle or fuzzy pair of socks and you are all set!


Download this FREE tag HERE

Hope you all have some fun thinking of more teacher gifts! Would love to know some ideas you have!
 photo signature.png

Tuesday, November 6, 2018

DIY Eucalyptus Hanging Hoops

I originally started this project for a bridal shower I was hosting, but ended up not using them where I wanted to. Instead I knew these would be perfect hanging in my bedroom. They are simple yet cause a statement. 

These really are so simple to use and only use a few supplies

Supplies:

Hot Glue
Twine


Instructions

Start by cutting your faux eucalyptus into small. I cut by the stems and then layered them on the hoop to see what they looked like.


Once I decided how many per hoop to add, I started tying them on tightly with twine. I used green twine, but you can also use fishing wire to hide it. 

To hide the ending I clipped a single leave and hot glued it onto the stems. 


Cut any remaining twine that it sticking out. To hang on a wall use finishing nails and some additional twine. 


I love how this art turned out! Let me know if you make your hope hanging hoop design!
 photo signature.png

Thursday, October 25, 2018

Halloween S'mores Kit | DIY Printable

If you are down to the wire and looking for a cute yet super easy treat to hand out, you are in luck today! I recently made these for a client looking for something to hand out to her children's school class without spending too much or it being boring. 

This project was super easy to make and will definitely impress the recipients.

Materials Needed:

Sandwich Bags
Stapler


Place your s'mores item in a sandwich bag. You can also use a regular treat bag, however I wanted the graham crackers to stay fresh so I chose to use a bag that could seal!


I didn't want the corners of the bag to stick out, so I folded the corners into the middle of the bag to form a triangle and then folded the point down and stapled the bag. Fold your tag in half and staple onto the bag. So super easy!


Don't forget to get your own card too!


Download your own HERE
 photo signature.png

Friday, October 19, 2018

A Simple Bridal Shower

This past weekend I was able to shower my beautiful best friend with a simple bridal shower. Her wedding is not until February, but her and her future husband just purchased their first house, so what better time to get all things new!
The shower was held at her grandmother's clubhouse in the development she lives! It was such a nice place and so homey!
For the theme we decided to stick with the color pallet for her wedding- blues & navy's.  I wanted the decor simple yet elegant, so I tied the flowers on the invitation into the centerpieces and decor.


My Outfit:
Jumpsuit | Lilly for Target
Heels | old
Sweater | American Eagle (similar)
Belt | Nordstrom

Details:
Bucket List | Ash's Party Accents
Invite | Ash's Party Accents


 photo signature.png


Some posts contain an affiliate link through Rewards Style. If you click and purchase the item, I receive a small commission, however it is no additional cost to you! I appreciate your clicks and support of Ashley Maria Blog xo